Layered Graduation Ribbon Cake
Highlighted under: Dessert Recipes
I always look forward to celebrations, and nothing is more exciting than a graduation party. This Layered Graduation Ribbon Cake not only dazzles the guests with its vibrant colors but also delivers a delightful flavor profile that keeps everyone coming back for more. I love how each layer offers a different texture and taste, making it special for such a momentous occasion. It’s perfect for graduating students and is sure to become a cherished tradition in our family celebrations.
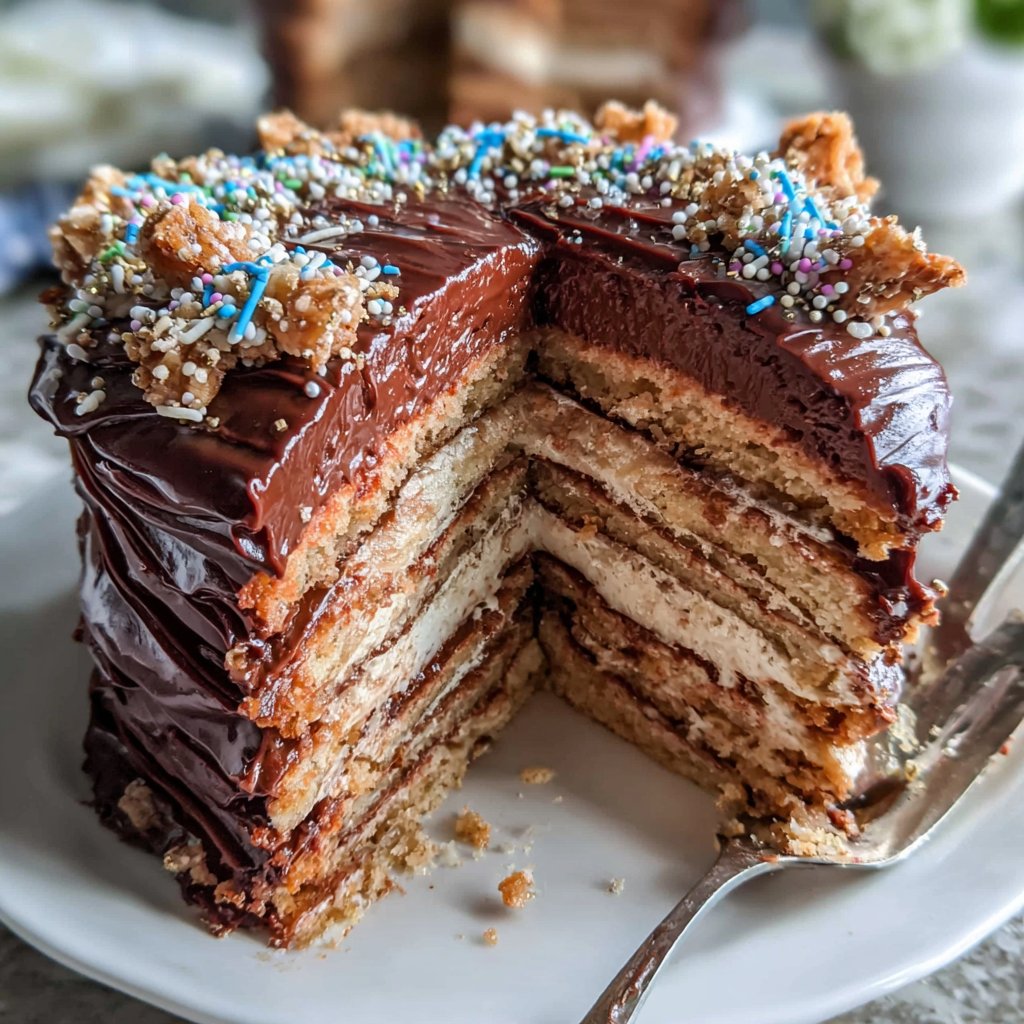
While planning for my youngest's graduation, I wanted to create something truly memorable. After experimenting with several flavors and color combinations, I discovered that a mix of chocolate, vanilla, and strawberry batter not only looked incredible but tasted amazing together. The vibrant layers represent the school colors and make a stunning centerpiece!
I also learned that allowing the layers to cool completely before frosting is essential to avoid melting. The frosting adds a beautiful finish and keeps the cake moist, which is a detail I now swear by every time I bake. My guests were as enamored with the presentation as they were with each delightful bite!
Why You Will Love This Cake
- A stunning visual centerpiece that celebrates achievement
- Delectable layers of flavor that surprise and delight
- Versatile for any celebratory occasion after graduation
Achieving the Perfect Cake Layers
To ensure your layered cake bakes evenly, it's crucial to accurately measure your ingredients. Using weight measurements instead of volume can enhance precision; for instance, weighing flour is often more reliable than relying on cups. Additionally, make sure your eggs are at room temperature for better incorporation into the batter, which helps create a fluffier structure as they whip up more easily with the butter and sugar.
When dividing your cake batter for the colorful layers, aim for equal portions to maintain consistent baking times across layers. If you're unsure about your divisions, you can use a kitchen scale to weigh each bowl. This attention to detail will certainly pay off in how visually stunning and uniform the cake layers appear.
Frosting Tips for a Flawless Finish
Achieving the right texture for your frosting is key to creating a beautifully finished cake. If the frosting is too thick, simply add a tablespoon of milk or cream at a time until it reaches a smooth, spreadable consistency. Conversely, if it becomes too runny, you can mix in extra powdered sugar to thicken it. Keep in mind that room temperature butter helps achieve that light and fluffy texture that holds up well when decorated.
When applying frosting between the layers, don’t skimp! A thicker layer of frosting not only adds flavor but also acts as a stabilizer, helping to keep the layers from shifting during assembly. For an eye-catching effect, consider using a spatula to create a smooth finish, or embellish with a piping bag if you're comfortable with decorating techniques.
Storage and Serving Ideas
This Layered Graduation Ribbon Cake can be made ahead of time, allowing the flavors to meld beautifully. Wrap the individual cooled layers tightly in plastic wrap and freeze them for up to three months. When ready to serve, let the layers thaw in the refrigerator overnight before frosting. This also helps prevent the cake from becoming dry, as freezing locks in moisture effectively.
To add a unique touch when serving, try garnishing each slice with fresh fruit or edible flowers that match the cake’s colors. These additions not only enhance the visual appeal but also introduce fresh flavors that complement the rich chocolate cake and sweet frosting, creating an unforgettable dining experience at your graduation party.
Ingredients
For the Cake:
- 2 cups all-purpose flour
- 1 ½ cups granulated sugar
- 1 cup unsweetened cocoa powder
- 1 cup unsalted butter, softened
- 5 large eggs
- 1 cup milk
- 1 tablespoon vanilla extract
- 2 teaspoons baking powder
- 1 teaspoon baking soda
- ½ teaspoon salt
For the Frosting:
- 2 cups unsalted butter, softened
- 8 cups powdered sugar
- ½ cup heavy cream
- 2 teaspoons vanilla extract
- Food coloring (red, yellow, green, blue)
Instructions
How to Make Your Cake
Prepare the Cake Batter
Preheat your oven to 350°F (175°C). In a large mixing bowl, cream together the butter and sugar until light and fluffy. Add in the eggs one at a time, mixing well after each addition. Stir in milk and vanilla extract. In a separate bowl, whisk together the flour, cocoa powder, baking powder, baking soda, and salt, then gradually add to the wet mixture. Mix until just combined.
Bake the Layers
Divide the batter into three equal portions. Add food coloring to each portion to create the desired layers. Pour each colored batter into greased and floured round cake pans and bake for 25 minutes or until a toothpick comes out clean. Let layers cool completely before removing from pans.
Prepare the Frosting
In a large bowl, beat the softened butter until creamy. Gradually add the powdered sugar and mix well, adding heavy cream and vanilla to reach desired consistency. Beat until the frosting is fluffy.
Assemble the Cake
Once layers are cooled, place the first layer on a serving plate. Spread an even layer of frosting on top, then add the second layer. Repeat with the last layer. Cover the entire cake with remaining frosting and decorate as desired with additional colors.
Enjoy!
Pro Tips
- For best results, use gel food coloring to achieve vibrant cake layers and chill the assembled cake for an hour before serving to help the frosting set.
Variations to Personalize Your Cake
While this recipe highlights vibrant colored layers, you can easily tailor the cake to fit theme-specific colors or flavors. Consider substituting the cocoa powder in one of the cake layers with a flavored extract like almond or lemon, or incorporate fruit purees to enhance moisture and freshness. These tweaks can make the cake a true reflection of the graduate's personality and preferences.
Additionally, explore using different frosting techniques, such as a velvety ganache or a light whipped cream, to switch things up. These alternatives can give your cake a different mouthfeel and flavor profile, ensuring that the cake resonates well with various palates at your celebration.
Troubleshooting Common Issues
If your cake layers dome while baking, it could be a sign of overmixing or too high an oven temperature. To fix a dome, you can level the tops with a serrated knife once the cake layers have cooled. Always double-check your oven's calibration too, as even minor variances can significantly affect baking results.
Another common issue is frosting melting or sliding off during assembly. Make sure the cake layers are fully cooled before frosting; warm layers can melt the frosting. If you're in a warm environment, consider chilling the assembled cake in the refrigerator for about 30 minutes to set the frosting before decorating or serving.
Questions About Recipes
→ Can I make this cake ahead of time?
Yes, you can bake the layers a day in advance and frost it on the day of the event.
→ What alternative colors can I use for the frosting?
You can customize the frosting colors to match your event theme. Use any food coloring you prefer.
→ Can I substitute the butter in the frosting?
Yes, you can use a vegan butter substitute if you're looking for a dairy-free option.
→ How should I store leftover cake?
Store the cake in an airtight container in the refrigerator for up to five days.
Layered Graduation Ribbon Cake
Created by: The Chefezekielcooks Team
Recipe Type: Dessert Recipes
Skill Level: Intermediate
Final Quantity: 12 servings
What You'll Need
For the Cake:
- 2 cups all-purpose flour
- 1 ½ cups granulated sugar
- 1 cup unsweetened cocoa powder
- 1 cup unsalted butter, softened
- 5 large eggs
- 1 cup milk
- 1 tablespoon vanilla extract
- 2 teaspoons baking powder
- 1 teaspoon baking soda
- ½ teaspoon salt
For the Frosting:
- 2 cups unsalted butter, softened
- 8 cups powdered sugar
- ½ cup heavy cream
- 2 teaspoons vanilla extract
- Food coloring (red, yellow, green, blue)
How-To Steps
Preheat your oven to 350°F (175°C). In a large mixing bowl, cream together the butter and sugar until light and fluffy. Add in the eggs one at a time, mixing well after each addition. Stir in milk and vanilla extract. In a separate bowl, whisk together the flour, cocoa powder, baking powder, baking soda, and salt, then gradually add to the wet mixture. Mix until just combined.
Divide the batter into three equal portions. Add food coloring to each portion to create the desired layers. Pour each colored batter into greased and floured round cake pans and bake for 25 minutes or until a toothpick comes out clean. Let layers cool completely before removing from pans.
In a large bowl, beat the softened butter until creamy. Gradually add the powdered sugar and mix well, adding heavy cream and vanilla to reach desired consistency. Beat until the frosting is fluffy.
Once layers are cooled, place the first layer on a serving plate. Spread an even layer of frosting on top, then add the second layer. Repeat with the last layer. Cover the entire cake with remaining frosting and decorate as desired with additional colors.
Extra Tips
- For best results, use gel food coloring to achieve vibrant cake layers and chill the assembled cake for an hour before serving to help the frosting set.
Nutritional Breakdown (Per Serving)
- Calories: 450 kcal
- Total Fat: 24g
- Saturated Fat: 15g
- Cholesterol: 90mg
- Sodium: 180mg
- Total Carbohydrates: 56g
- Dietary Fiber: 2g
- Sugars: 30g
- Protein: 5g